
Base Plate Preparation
The diagram on the left shows a rusty base plate (1). This surface need to be prepared by blasting the metal surface to an SSPC- SP to SSPC-SP10 blast cleanliness (2). The SP6 and SP10 is a standard for surface cleanliness. Once the base has been blasted to the required cleanliness with a 2.0 mils profile it will is ready for epoxy grout. If more than 24 hours may pass until the base can be grouted then the underside of the base plate must be primed to “hold” the preparation. We recommend using MS-7CZ primer (3), however an epoxy primer can be used and must be rated for a minimum 1200 psi adhesion. Radius all sharp edges buried in grout. Check for sufficient vent holes, leveling screw details and compartment porting. Since adhesion is our main objective, I would be sure to use the types of abrasive that would result in the best anchor profile. The anchor profile should be 2.0 mils or greater for best adhesion. The preferred types of abrasive media would be:
Recommended:
- Coal Slag (Black Beauty)
- Garnet
- Aluminum Oxide
- Crushed Glass (not beads)
- Other blasting sand that can produce an anchor profile
Not Recommended:
- Glass Beads
- Walnut Shells
- Corn Cob
- Small Fine Silica
- Steel Shot
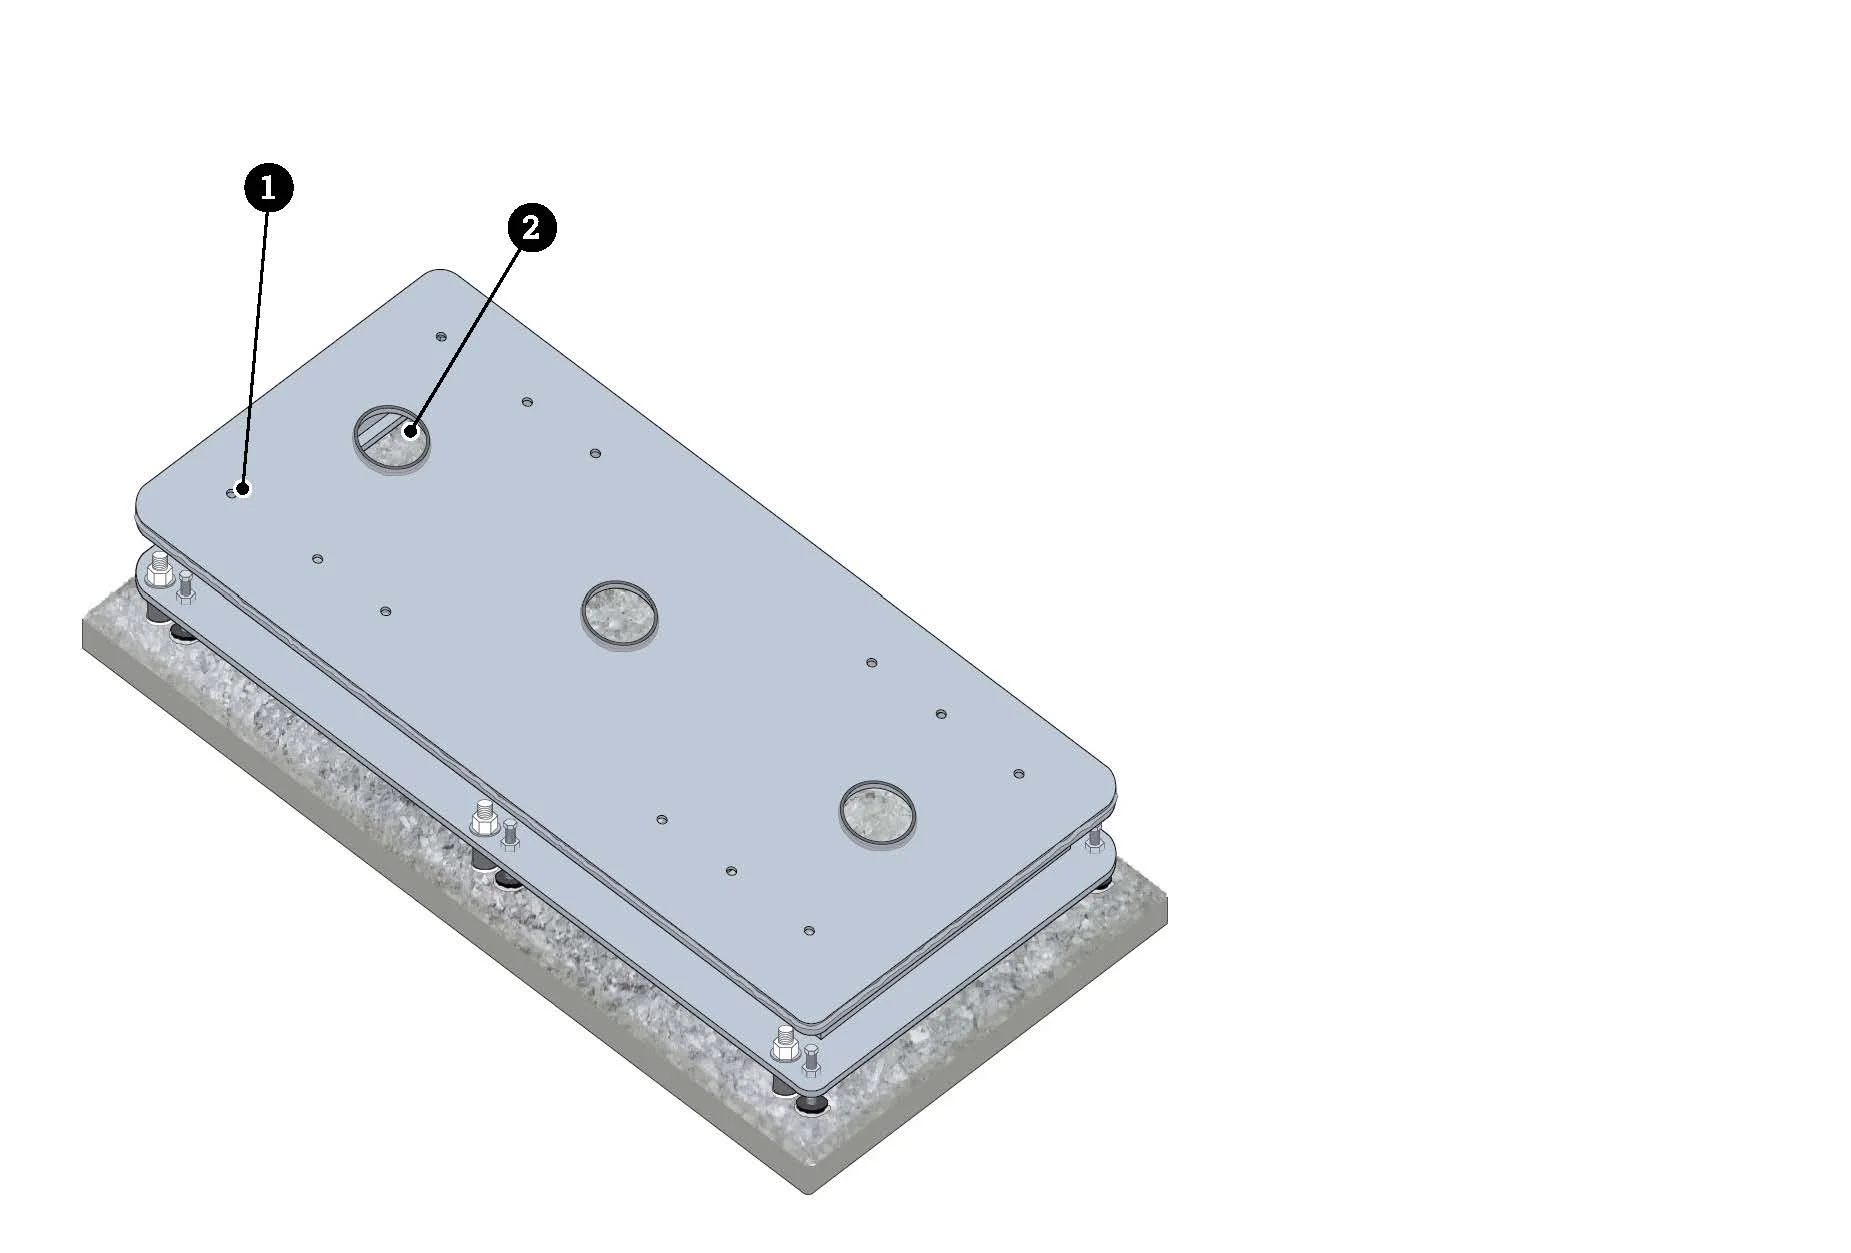
Base Plates with a Closed Cavity
Some base plates come with the cavity enclosed as shown on the left. If your base has a closed top please check your vent holes (1). The vent holes should be in the corner of the compartments to allow for air to escape and not be trapped under the base causing a void. The vent holes should be paired or on both sides of an internal stiffener. If there is a high point in the top of the base additional vent holes may be required to properly vent any trapped air. When in doubt drill additional vent holes as it is much easier than trying to fill voids after the gout has been poured. Make sure you have proper fill holes on the base (2). Make sure just inside the fill holes the bottom is flush with the bottom of the base. This will help to eliminate any voids when pouring grout.
Base Plate Setting
Once the surface that will come in contact with the grout has been prepared the base plate is ready to be set on the foundation. The base plate will be installed on the prepared concrete foundation and supported by the temporary leveling devices or jack bolts.
Jack Bolt/Leveling
A jack bolt is a temporary means to support and to hold level until the grout is placed and set. Use the jack bolts to level the base to manufactures or owners specifications. Once this level is achieved a small torque approximately 10% of the bolt yield is taken on the anchor bolts to hold the base in place and prevent any movement during the grout installation process. Once the base is leveled the jack bolts will need to be coated with a layer of never seize or a grease, taking care not to coat the bottom of the base. This will allow for the jack bolts to be removed after the grout has cured. Our goal is the have the entire bed of grout support the base and removing the jack bolts will prevent point loading.
Any leveling device has to be removable after grout is set- otherwise the final torque taken on the anchor bolt will merely attempt to compress the leveling device, not “sandwich the system.”
We, therefore highly recommend the use of leveling screws instead of shims.
- At least one near each anchor bolt
- Should be sized to support equipment
- Must be greased for easy release
- Should be bearing on a metal pad